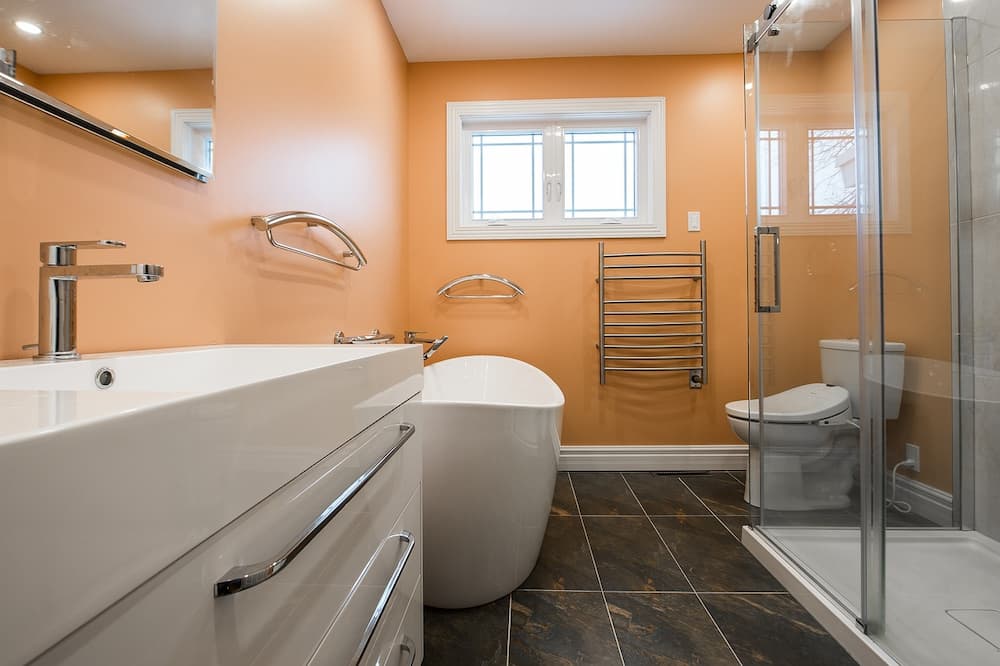
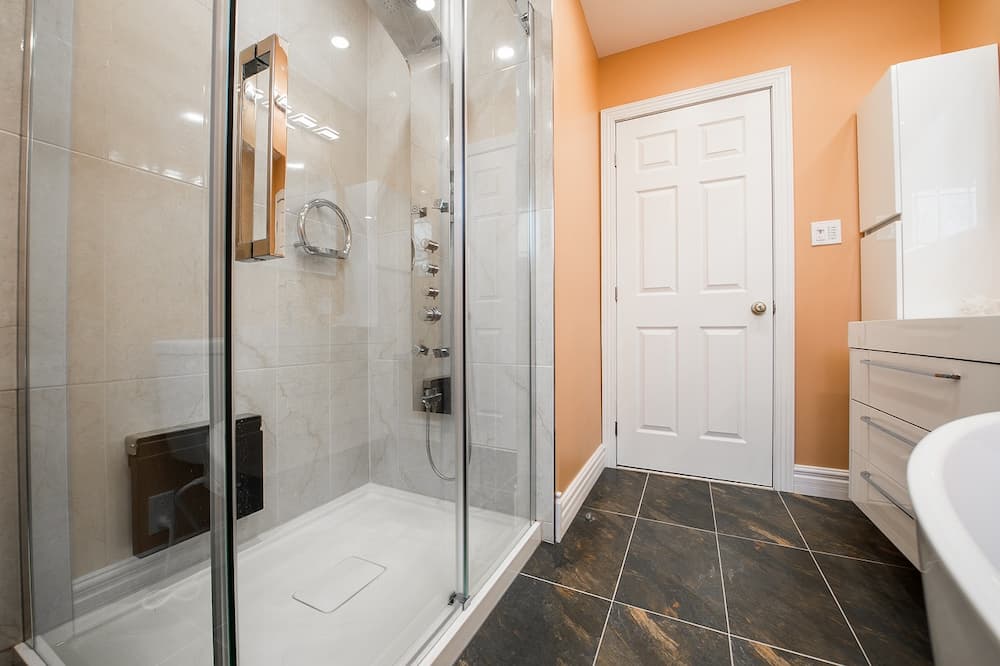
To achieve the best results, you need to take the steps to renovate a bathroom. Every contractor has a plan and perhaps a slightly unique approach to doing it the right way. Our process allows us to work closely with clients to set the proper expectations, establish a timeline and remain within the budget. So here’s a general guideline on how to plan a bathroom remodel.
1. Hire a reliable contractor
There are probably dozens of bathroom contractors in Oshawa, but not all can provide a high-quality bathroom remodel. BROpros (that’s us) has the experience and a good reputation in the industry.
Before deciding on a bathroom remodelling company, ask for referrals to get an idea of the quality of the work. Ask potential contractors questions about the materials they use, their timeline for completion, any guarantees they offer, and their process for ensuring the work is completed to your satisfaction.
Our clients and testimonials prove the quality of our work and highlight the types of materials and ingenuity we offer. We have a gallery of projects similar to yours that you can explore for ideas, and if you’re looking for something specific, our experienced designers can help create a custom solution.
You have to put in the effort and time to find a reliable contractor whose aesthetic and value align with your vision. Choose quality and reputation over price (we beat everyone in all categories!). Be sure to read reviews and get a few references before deciding. A well-trusted contractor will give you peace of mind that your bathroom remodel process will go smoothly.

2. Draw up a plan
A layout is essential for a successful bathroom remodel. We help you clearly envision what your new bathroom will look like and how it will function. We visit your home and work with you at your convenience to draw up a plan that meets your needs. This includes assessing existing conditions, taking measurements, discussing style preferences and designing a custom layout for your bathroom.
Depending on your budget and the condition of the existing bathroom, we can help you figure out what’s staying and what’s going on, what fixture and material upgrades are needed, and how to maximize the space. We also discuss any additional construction requirements that may be necessary.
Our on-site design team will create a rendering of the bathroom, so you can get an idea of what it will look like before we start any construction. With the help of a visual design, you can visualize the space, see what materials and fixtures work together, and make any necessary revisions.
3. Establish a budget
At this point, we have a good idea of the scope of the project and can confidently provide an accurate estimate for the job. We will review the details with you and assist in determining a budget that works best for your ideal new bathroom. This includes discussing upgrade options, fixture selections and material choices.
We understand that costs can be a primary concern for any remodel. To help keep costs down, we offer a variety of materials and fixtures at various prices.
We also work with you to decide on the most appropriate materials and products that fit your budget.
We provide a complete list of all the costs upfront, so there are no surprises down the line. We are always transparent with our pricing and willing to answer any questions you may have.

4. Source the materials
What sets us apart from other contractors is that we source all the materials directly from our suppliers. This means you get high-quality products at competitive prices and avoid the hassle of finding and placing orders with various stores. Having us source the materials also helps us keep construction costs down since we can buy in bulk and directly from the manufacturer.
We have access to a wide range of materials, from luxurious marble countertops, drywall, tile, and tub fixtures to custom-crafted vanities. We place orders, manage the delivery of all materials, and take care of any scheduling issues.
5. Demolishing your old bathroom
It may take a couple of days to completely gut the existing bathroom of all of its fixtures and materials. Before demolition, we disconnect and cap off all the existing plumbing lines and the room’s electricity. We use specialized equipment to carefully remove fixtures, hardware, and tile. All debris is removed from the site to leave you with an empty canvas for your new bathroom.
During this stage, we take extra care to protect the rest of your home from any dust or debris that could be kicked up during demolition. We use drop cloths, sheeting, and other materials to seal off the bathroom from the rest of your home.
6. Groundwork and rough-in
This is a critical part of the process, as it sets the stage for a successful bathroom remodel. It involves a lot of technical work, including measuring and marking all the stub-outs for fixtures and drains, framing walls and floors, installing new plumbing and electrical wiring for the fixtures, and setting up ventilation.
Our skilled artisans have decades of experience with complex remodelling projects. With a plan in hand, transferring the design from paper to reality is a nearly seamless process. Depending on the scope of the project, this part of the installation can take anywhere from a few days to several weeks. It involves:
a) Drywall, concrete board:
Installing the walls and floors for new tile and drywall. If your bathroom is a larger space, you may opt to go with the concrete board instead of drywall. We approach each situation with thoughtful consideration and advise you on the best options based on your goals.
b) Plumbing and electrical:
Installing the drain assembly, setting up water and sewer lines, hooking up all of the plumbing fixtures to your home’s main water supply, and running electrical lines for outlets, fans, light fixtures, and other appliances.
c) Taping:
We use building-grade tapes and mudding compounds to ensure that all of the seams between the pieces of drywall are sealed correctly. We also use mudding and taping techniques to ensure that the walls are ready for painting.
d) Sanding, priming, and painting:
Once the walls are up, we use sanders to get rid of any rough edges. This prepares the walls for a layer of primer and a coat (or two) of paint to prepare your bathroom for the final perfect finishing touch. We use high-quality paints that are designed to last and stand up to the humidity of a bathroom.
e) Install schluter system:
Your new shower area needs to be waterproofed properly, and one of the best ways to do that is by installing a schluter system. Schluter systems are designed to protect the edges of tiled areas from grout failure and water infiltration. They are also an effective way to prevent cracked tiles and other common shower problems. Installing a Schluter system involves placing the appropriate materials around the edges of your shower area, including waterproof membranes, backer boards and others.
f) Heated floors and new glass:
Depending on your preferences, you may want to add heated floors and new glass to your bathroom. Heated floors provide a luxurious touch that many people find inviting, especially during winter. Adding new glass or a shower door can help bring the look of your bathroom together, creating a space that’s both beautiful and functional.
g) Put up the tile:
A crucial step in renovating a bathroom is installing the tile. This is not only done for aesthetic reasons but also to ensure waterproofing and durability of the bathroom. Depending on the type of space you have, there are various tile types available to choose from. If you’re replacing a tub, you’ll need to ensure that the tile chosen is suitable for wet surfaces and has good slip resistance. If installing heated floors, you’ll need to ensure the tile chosen is suitable for use with heated flooring.
h) Trim around the windows, baseboards, and floors:
Once the tile is set in place, it’s time to trim around the windows and doors, as well as baseboards and floor trim. This will help to provide a clean and finished look and also prevent moisture from seeping in between the tile and the trim.
i) Install vanity and toilet:
We move on to installing the vanity and toilet. This is an important step as it plays a large role in the overall look of your bathroom. We ensure that the vanity is securely attached to the wall and that all connections are tight. We will also use a level to ensure that it is perfectly straight. We then install the toilet, following all plumbing codes and ensuring it is securely mounted.
7. Final paint
Before we fix other fixtures and accessories, the walls must be properly painted with good quality paint for better finishing. After taping and sanding drywall, it is important to prime the walls first before painting. In order to get a professional look and feel, two coats of paint may be required for better results. After the paint is dried, we will move on to install other fixtures.
8. Install other fixtures
Your bathroom is incomplete without all of the necessary fixtures. This includes:
- A showerhead
- Sink faucet
- Towel bars or hooks
- Toilet paper holder
- Bathroom Cabinet
- Shower curtains or shower doors
- Mirror
- Ventilation fan
- Lights
- Heated towel rack
- Bathroom seating
- Toothbrush holder
- Hot tubs, if desired
- Bidets, if desired
- fixtures like steamers, whirlpools or rain showerheads
- Any other optional fixtures you may choose to add.
9. Final Touches
Every bathroom needs the final touches for a perfect look. We will wipe down all of the fixtures, check for any areas that may need additional caulking, and examine the area for any potential issues. We will also make sure that all fixtures are functioning properly and that there are no leaks or other problems. Finally, we will ensure that all of the trash and materials are cleaned up before leaving.
Your bathroom is now ready for use!